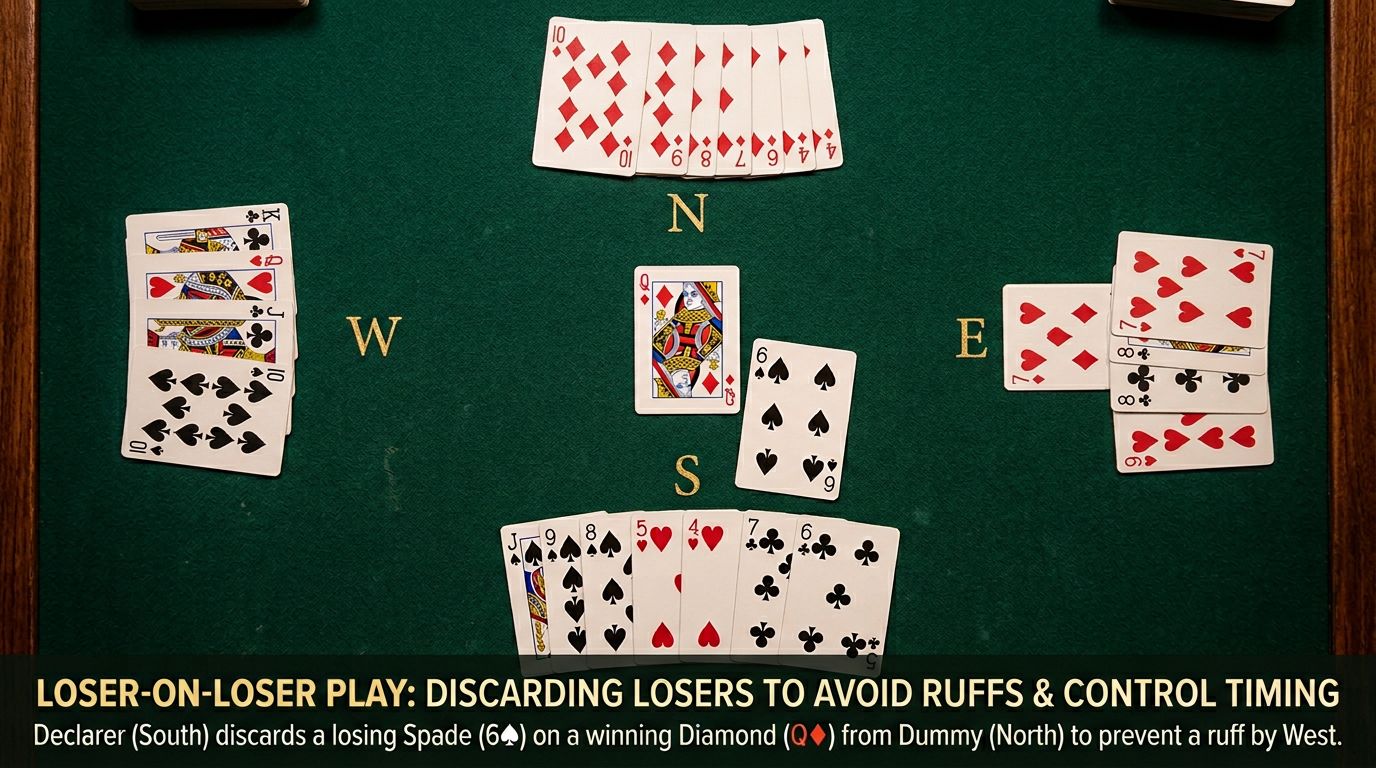
Loser-on-Loser Plays: Discarding Losers to Avoid Ruffs an...
You’re going to lose a trick. The question is when, to whom, and what you’re going to get for it.
Loser-on-loser plays are counterintuitive. Instead of ruffing a loser, you discard a different loser on it. Instead of winning a trick, you pitch something you were going to lose anyway. It looks wrong. It feels wrong. But in the right situation, it’s the only way to make the contract.
The principle: Sometimes you’re better off losing the trick you want to lose rather than the trick they want you to lose.
The Basic Concept
Contract: 4♥
Dummy:
♠ K 7 4
♥ K 8 3
♦ A 6 5 2
♣ 9 7 3
Declarer:
♠ A 6 2
♥ A Q J 10 9
♦ K 7 3
♣ A 6 2
Opening lead: ♣K (they have K Q J)
Count your losers: One spade, three clubs. You’re down one.
West continues clubs. You could ruff the third round in dummy. But that doesn’t help, you still have a spade loser and they’ll eventually get their club trick.
Instead: Win the first club, win the second club, and on the third club lead, pitch a spade from dummy (or from hand). Let them have their club trick. You’ve traded one of your club losers for your spade loser.
Now you have three losers instead of four, and you haven’t wasted a trump on a ruff that doesn’t help.
This is loser-on-loser. You deliberately lose a trick to eliminate a different loser.
Avoiding the Deadly Ruff
The most common use is avoiding ruffs.
Contract: 4♠
Dummy:
♠ K Q 6 4
♥ A 8 6
♦ K 7 5 2
♣ 6 3
Declarer:
♠ A J 10 9 8
♥ K 3
♦ A Q 6
♣ A 7 4
Opening lead: ♣K, partner plays the ♣2, you play the ♣4.
West continues with the ♣Q. East plays the ♣5. You know what’s coming: East is going to ruff the third club.
If you win the ♣A and they continue clubs, you’re getting ruffed. That’s one loser. You also have a club loser (the 7). Two losers.
Wrong play: Win the ace, draw trumps, eventually lose a club. Down one when East ruffs.
Right play: On the second club (or the third), pitch a heart from dummy (or from hand) instead of winning your ace. You’re going to lose a club anyway, so lose it now. They can’t give East a ruff because you never won the ace.
You’ve traded your club loser for your heart loser. You’re still losing two tricks, but now neither of them is a ruff.
Removing Entries to Dangerous Opponents
Sometimes you want to lose a trick to the safe opponent, not the dangerous one.
Contract: 3NT
Dummy:
♠ 6 5
♥ K 7 4
♦ K Q J 10 8
♣ 9 7 3
Declarer:
♠ A K 7
♥ A 8 3
♦ 9 6 4
♣ A K 6 2
Opening lead: ♠Q (West has Q J 10 9 8)
You duck the first spade, win the second. You’ve got eight top tricks and need one more from diamonds. But West has a pile of spades.
If you knock out the ♦A and West has it, you’re dead. West will run spades.
Watch the first trick carefully. If East plays an encouraging card (say the 4), East has something in spades. If East plays a discouraging card (say the 2), East is saying “I can’t help in spades.”
Play: Cross to dummy in hearts, lead a diamond toward your hand. If East has the ♦A, play the 9 from hand. Let East win! East doesn’t have spades to return, so you’re safe.
This is a loser-on-loser. You’re playing low from both hands, deliberately letting East win with the ace when you could have finessed the other way. You’re “losing” to the safe opponent.
If West has the ♦A, you were always in trouble. But if East has it, this play makes the contract.
The Trump Coup Setup
Here’s an advanced use: Sometimes you discard losers to shorten your trump holding to match the opponent’s, setting up an endplay.
Contract: 6♠
Dummy:
♠ A Q 6 4
♥ A 8 2
♦ K 7 5
♣ 8 6 3
Declarer:
♠ K J 10 9 8
♥ K 3
♦ A Q 6
♣ A 7 4
You’re missing the ♠7 5 3 2. You cash the king and ace of spades and East shows out on the second round. West has ♠7 5 3.
You have three trumps (J 10 9), West has three trumps (7 5 3). If you lead toward your hand, West will score the 7 eventually.
Solution: Play winners in the side suits and pitch losers from your hand. Cash hearts, diamonds, whatever you’ve got. On your last side winner, discard your last club from hand.
Now you have three trumps, West has three trumps, and you’re on lead from dummy. Lead toward your J 10 9. West is cooked. If West plays low, you play the 9 and it wins. If West plays the 7, you play the 10 and it wins.
This is called a trump coup. The loser-on-loser technique shortened your trump holding to match West’s, and now positional factors win the trick.
Timing: Gaining a Tempo
Sometimes you discard a loser to retain control of the timing.
Contract: 4♥
You have three inevitable losers in side suits. You need to draw trumps and establish a side suit before opponents can cash their tricks.
They lead a suit where you have two losers. If you win, draw trumps, and try to establish your side suit, they’ll win and cash their tricks.
Alternative: Lose the first trick immediately (discard from the other hand). Now you can win the next lead, draw trumps, and work on your side suit. By losing early, you’ve gained control of the tempo.
This comes up when you can’t afford to lose the lead twice. Lose it once on your terms, keep it when it matters.
Avoiding an Overruff
Here’s a position that comes up:
Contract: 4♠
Dummy: ♥void, ♦K Q J
Your hand: ♥A K 8 7, ♦6 5 4
They lead a heart. You could ruff in dummy and draw trumps. But you also have three diamond losers.
Better: Play a diamond from dummy at trick two (after ruffing the heart). If they win and lead another heart, pitch a diamond from hand instead of ruffing. You’re going to lose three diamonds anyway; trade one for the heart loser.
Now you’ve avoided ruffing with dummy’s trumps (which you need for other purposes) and you’ve reduced your diamond losers to two.
When NOT to Use Loser-on-Loser
Don’t use this technique when:
- You can make more tricks by ruffing. If ruffing in dummy creates extra tricks, do it.
- You need to retain trump control. Sometimes you need every trump to prevent opponents from drawing yours.
- The loser you’re discarding could be ruffed in dummy later. Save it for a useful ruff.
- You’re in notrump. This is mainly a suit contract technique. In notrump, you usually just win your tricks and concede your losers normally.
The Discovery Play
Sometimes you discard a loser to find out who has what.
Contract: 4♠
You have a two-way finesse for the queen of trumps. You don’t know which way to finesse.
Lead a side suit where you’re going to lose a trick anyway. See who wins it. That tells you who has entries, maybe who has length, and might help you guess the trump queen.
This is a loser-on-loser as information gathering. You were losing the trick anyway; you might as well learn something.
Eliminating Exit Cards
Before an endplay, you often need to strip opponents’ safe exit cards. Loser-on-loser can help.
Contract: 4♥
You’re planning to throw West in and force a lead that gives you a trick. But West has a safe exit card in clubs.
Solution: Lead clubs early, discarding losers from one hand or the other, until both you and West are out of clubs. Now when you throw West in, West has no safe exit and must give you a trick.
You’ve “lost” your clubs deliberately to set up the endplay.
The Key Question
Before you play loser-on-loser, ask:
- What am I gaining?
- What am I giving up?
- Can I afford to lose this trick now?
- Will this help with entries, timing, or eliminations?
If the answer is “it helps with something,” do it. If the answer is “I’m just losing a trick for no reason,” don’t.
Common Mistakes
Ruffing automatically: You see a short suit, you ruff. But sometimes the ruff doesn’t create a trick, and you’re better off discarding.
Winning every trick you can: In suit contracts especially, losing the right trick at the right time can be better than winning it.
Not planning ahead: Loser-on-loser plays usually need to be planned from trick one. If you ruff carelessly, you’ve lost your chance.
Giving up on tricks you could make: Don’t confuse loser-on-loser with just losing tricks. You should still win every trick you can unless there’s a specific reason not to.
Practice Positions
Position 1:
Contract: 4♥, opening lead ♣K
Dummy: ♠K 6 4, ♥K 8 3, ♦7 6 5 2, ♣9 7 3
You: ♠A 8 2, ♥A Q J 10 9, ♦A K 3, ♣6 2
They continue clubs. You have two club losers and a spade loser. What do you do?
Answer: On the third club, discard a spade from dummy (or from hand). You’re losing two clubs anyway; trade one for the spade loser. Now you only lose three tricks total.
Position 2:
Contract: 4♠, you’re missing ♠Q x x in one hand
They lead hearts. You have two heart losers. Dummy is void in hearts. Do you ruff?
Answer: Depends. If ruffing helps you (shortening dummy to set up a trump coup, or if you need the entry), ruff. If you have heart losers in hand and no good use for the ruff, pitch a diamond or club from dummy on the second heart. Save dummy’s trumps for drawing theirs.
Position 3:
Contract: 3NT, they lead spades, you have A x
West leads the ♠Q. You have seven top tricks and need two from diamonds. The ♦A is missing.
East plays the ♠2 (discouraging). How do you play diamonds?
Answer: Lead toward your hand from dummy. If East plays low, play low from your hand, letting East’s ace win (if East has it). This is a loser-on-loser to the safe opponent. East can’t hurt you with a spade return.
Improve Your Declarer Play with Brian
Brian analyzes your hands and explains the best declarer strategy, from planning your play to executing endplays. Try Brian free →
The Bottom Line
Loser-on-loser plays are about control:
- Control of which opponent gets in
- Control of timing
- Control of which tricks you lose
You’re going to lose tricks anyway. The skill is losing them on your terms, not theirs.
Next time you see a ruffing situation, pause. Ask if the ruff actually creates a trick or if you’re better off pitching a loser. The answer might surprise you.
This technique won’t come up every hand. But when it does, it’s often the difference between making and going down. Learn to recognize the spots, and you’ll make contracts that look impossible.