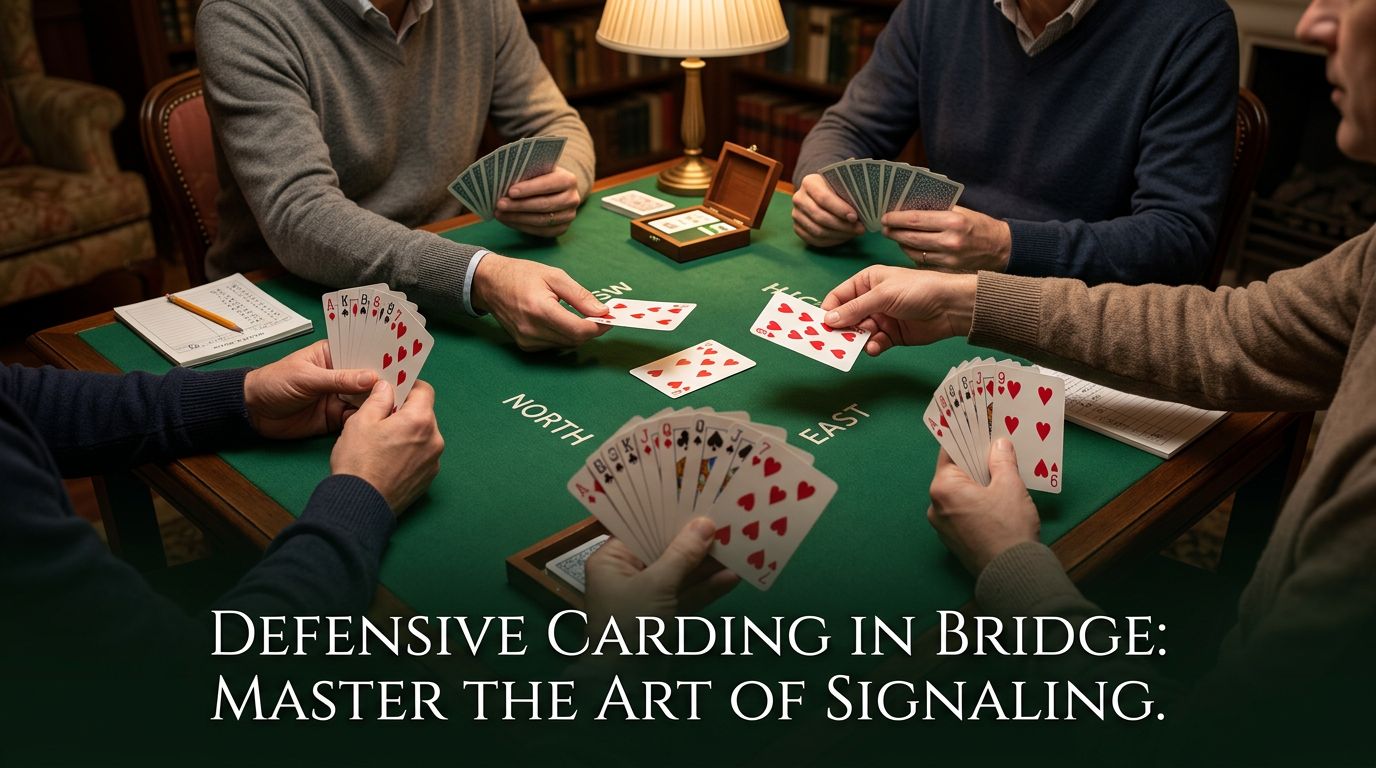
Defensive Carding in Bridge: Master the Art of Signaling
When declarer can see both their hand and dummy, they have a massive advantage. As a defender, you’re flying blind, you can’t see your partner’s cards. That’s where defensive carding comes in. Through the cards you play, you can send signals to partner about your hand, turning two separate defenders into a coordinated team.
Bridge defensive carding is the silent language that lets you and partner work together to defeat contracts. Whether you’re showing attitude about a suit, giving count, or indicating suit preference, these signals can mean the difference between setting a contract and letting declarer make an overtrick.
What Is Defensive Carding?
Defensive carding (also called defensive signals or defensive signaling) is the practice of conveying information to your partner through the specific cards you choose to play on defense. While you must follow suit, you often have a choice of which card to play, and that choice carries meaning.
The basic principle is simple: the card you play sends a message. A high card might say “I like this suit, partner!” while a low card might say “I have nothing here” or “I have an odd number of cards.” The trick is knowing which type of signal to give at which moment.
There are three main types of defensive signals:
- Attitude signals: Show whether you like or dislike a suit
- Count signals: Show how many cards you hold in a suit (odd or even)
- Suit preference signals: Indicate which suit you’d like partner to play next
The art of defensive carding lies in knowing which signal to give when, and in reading partner’s signals accurately while still defeating the contract.
Standard vs. Upside-Down Attitude Signals
When you’re following to a suit that partner has led or is leading, you often want to tell them whether you like that suit, whether you want them to continue it or shift to something else. This is an attitude signal.
Standard Attitude Signals
In standard signaling (also called “standard attitude”), you use high cards to encourage and low cards to discourage:
- High card = “I like this suit!” (encouraging)
- Low card = “I don’t like this suit” (discouraging)
For example, if partner leads the ♠K and you hold ♠Q73, you’d play the ♠7 to encourage. You want partner to continue spades so your queen will win the third round. If you held ♠732 instead, you’d play the ♠2 to discourage—you have nothing in spades, so partner should probably shift.
The card you play doesn’t need to be extremely high or low—just higher or lower than expected. Playing the ♠7 from ♠732 is encouraging (it’s your highest spot card), while playing the ♠2 is clearly discouraging.
Upside-Down Attitude Signals
Many modern partnerships play upside-down attitude signals (also called “reverse attitude” or UDCA: Upside Down Count and Attitude). The meanings are reversed:
- Low card = “I like this suit!” (encouraging)
- High card = “I don’t like this suit” (discouraging)
With upside-down signals, if partner leads the ♠K and you hold ♠Q73, you’d play the ♠3 to encourage. With ♠972, you’d play the ♠9 to discourage.
Why Play Upside-Down?
Upside-down signals have a practical advantage: when you encourage, you play a low card, preserving your high spot cards. This matters when you have holdings like ♥J1098—you want to encourage, but with standard signals, you’d have to waste the ♥10 or ♥9. With upside-down, you play the ♥8, keeping your touching honors together.
The downside? It’s less intuitive, and you must discuss it clearly with partner. Many tournament players prefer upside-down, while social players often stick with standard. There’s no “right” answer, consistency with partner is what matters.
Count Signals (Odd-Even)
Sometimes knowing whether partner has an odd or even number of cards in a suit is more valuable than knowing their attitude. Count signals tell partner how many cards you hold.
How Count Signals Work
In standard count signals:
- High-low = even number of cards (2, 4, or 6 cards)
- Low-high = odd number of cards (3, 5, or 7 cards)
If you hold ♦8642 and declarer leads a diamond, you’d play the ♦8 on the first round and the ♦4 on the second round—high-low shows your even number. With ♦842, you’d play ♦2 then ♦4—low-high shows an odd number.
(Note: Some partnerships play upside-down count as well, where low-high shows even and high-low shows odd. Always clarify with partner!)
When Count Matters
Count signals are crucial when:
- Declarer is running a long suit: Partner needs to know when you’ll run out so they know when to hold up their stopper
- Deciding whether to hold up an ace: If partner shows out on the third round, declarer may have only a 4-card suit
- Working out declarer’s distribution: If you know partner’s count, you can deduce declarer’s holdings
Imagine declarer is playing 3NT and running a long club suit. Dummy has ♣AKQ76 and you hold ♣J42. When declarer plays the ♣A from dummy, you play the ♣4 (starting a low-high sequence to show three cards). On the second round when the ♣K is played, you play the ♣2. Partner now knows you started with exactly three clubs and can count declarer’s length.
Suit Preference Signals
Sometimes you want to tell partner which suit to play next. That’s where suit preference signals come in, the most misunderstood and misused of the defensive signals.
The Basic Principle
When giving a suit preference signal, you’re not commenting on the suit being played. Instead, the card you choose indicates which of the other suits you want partner to lead:
- High card = preference for the higher-ranking of the two remaining suits
- Low card = preference for the lower-ranking of the two remaining suits
- Middle card = no preference
The key is that suit preference only applies in specific situations, not on every card you play.
Classic Suit Preference Situations
1. Giving partner a ruff
Partner leads the ♠A against a heart contract, and you play the ♠9 (a suspiciously high card when you clearly can’t have the king or queen). This “scream” asks partner to continue spades for you to ruff. When you ruff the second spade, the card you ruff with can show suit preference for your return.
If you ruff with the ♥9 (a high heart), you’re asking partner to lead the higher-ranking side suit when they get in. If you ruff with the ♥2, you want the lower-ranking suit.
2. Following to partner’s cashing sequence
When partner is cashing winners and you’re discarding, your discards can show suit preference. If partner cashes three rounds of spades and you discard ♦9, ♦8, ♦7 (high to low in diamonds), you’re screaming for a club switch (the higher of the remaining red suits being hearts, and you want the other red suit).
3. Returning partner’s lead
After winning a trick in the suit partner led, the card you return can show suit preference. If partner led a spade and you win the ♠Q, when you return a spade, a high spade suggests interest in the higher side suit, while a low spade suggests the lower suit.
When NOT to Use Suit Preference
Don’t give suit preference signals on opening leads, on the first round of a suit declarer is playing, or in situations where attitude or count information is more valuable. Suit preference is situational, use it when partner clearly knows you’re not showing attitude or count.
Smith Echo (Advanced)
The Smith echo (also called “Smith peter” or “Trump peter”) is a sophisticated signaling convention used primarily at trick one in notrump contracts. It’s named after J.G. Smith, who popularized it.
How Smith Echo Works
When partner leads a suit against a notrump contract, declarer plays from dummy, and you can’t beat dummy’s card, the card you play shows your attitude toward partner’s led suit, not the suit being played.
Here’s the key timing: your signal comes at trick one, but it’s about what you want at trick two and beyond.
If you encourage partner’s suit (using your partnership’s method, high for standard, low for upside-down), you’re saying “I like your lead, please continue it when you get in.” If you discourage, you’re saying “I don’t like your lead, please shift.”
Smith Echo Example
Partner leads the ♠4 against 3NT. Dummy has ♠K86 and plays the ♠K. You hold ♠Q72 and can’t beat the king. With standard signals, you’d play the ♠7 (high, encouraging) to say “I love spades, partner—when you get in again, please continue them!”
If declarer then plays a heart to your ace, you’d return partner’s spade suit, and the defense would cash enough spade tricks to beat the contract.
Without Smith echo, partners often struggle to know whether to continue their original lead or shift to a new suit. This convention clarifies things early.
When Smith Applies
Smith echo typically applies:
- At trick one in notrump contracts
- When you’re following to declarer’s first suit, not partner’s lead
- When both defenders have had a chance to signal
Not all partnerships play Smith echo, it requires discussion and practice. But it’s a powerful tool for coordinated defense in notrump.
Choosing Which Signal to Give
Here’s where defensive carding becomes an art. You can only play one card, but it might convey attitude, count, or suit preference. How do you decide?
Priority Guidelines
1. When partner leads a suit
On partner’s opening lead, attitude is usually your first priority. Partner needs to know if their lead is working. Show count only when attitude is obvious (like when you have the ace) or when partner clearly needs count information.
2. When declarer leads a suit
When declarer or dummy leads a suit, count is usually more important than attitude. Partner needs to know declarer’s length to plan the defense. Exception: if you must signal on the first round of declarer’s suit and partner will be making an important decision, attitude might matter more.
3. In special situations
Suit preference takes priority only in obvious situations: when giving or receiving ruffs, when returning partner’s suit, or when partner is cashing winners and needs to know what to shift to.
Context Is Everything
Consider the whole hand. If partner leads the ♥K and dummy has ♥AQJ10, your “attitude” is irrelevant—declarer has the suit locked up. In this case, you might give count instead, or even a suit preference signal.
Similarly, if you’re defending 4♠ and partner leads the ♦A, whether you “like” diamonds matters less than which suit you want switched to. Think about what information partner needs, not just what the “rules” say.
The Current Trick Matters
On the first round of a suit, you’re usually giving attitude or count. By the third or fourth round, count is often established, so you shift to suit preference. Stay flexible and think about what partner can learn from your card.
Example Defensive Carding Hands
Let’s see defensive carding in action with some realistic examples.
Example 1: Attitude Signal
Contract: 3NT by South
Partner leads: ♠K
Dummy: ♠A84 ♥K65 ♦QJ10 ♣8765
Your hand: ♠Q72 ♥974 ♦A84 ♣QJ109
Dummy plays low. You hold the ♠Q, so you want partner to continue spades. Play the ♠7 (high, encouraging with standard signals). When you get in with the ♦A, partner will know to continue spades, and you’ll beat the contract with your spade tricks.
Example 2: Count Signal
Contract: 3NT by South
Declarer leads: ♣3 from hand
Dummy: ♣AKQ76
Your hand: ♠J984 ♥72 ♦QJ105 ♣42
When dummy plays the ♣A, play the ♣4 (beginning a low-high sequence to show three cards—wait, you only have two!). With two clubs, you play high-low: play the ♣4 on the first round. On the second round, you’ll play the ♣2, completing your high-low signal to show an even number (two cards).
Partner can now count: if you have two and dummy has five, declarer has six. Partner knows they should hold up their ♣J until the third round.
Example 3: Suit Preference
Contract: 4♥ by South
Partner leads: ♠A (you’re void in spades)
Your hand: — ♥842 ♦KQ1076 ♣J954
Partner’s ♠A lead hits your void! When partner continues with the ♠K at trick two, you ruff. But which card do you ruff with? You want a diamond return (your strength), which is the higher-ranking of the side suits (diamonds vs. clubs). Ruff with the ♥8 (high) to show diamond preference.
When partner later gets in with the ♥A, they’ll lead a diamond to your ♦K, and you’ll cash diamond tricks to defeat the contract.
Example 4: Smith Echo
Contract: 3NT by South
Partner leads: ♥5
Dummy: ♥K108 ♦AKQ ♣KQJ76 ♠84
Your hand: ♥QJ63 ♦843 ♣42 ♠KJ96
Dummy plays the ♥K. You can’t beat it, so you signal. You hold ♥QJ—you definitely want hearts continued! Playing Smith echo with standard signals, play the ♥6 (high, encouraging) to say “I love your heart lead.”
Declarer will probably attack clubs. When you or partner get in with the ♠A, partner will know to continue hearts, running the suit for down two.
Common Carding Mistakes
Even experienced players make defensive carding errors. Here are the most common pitfalls:
1. Signaling When You Shouldn’t
The worst mistake is giving declarer information they can use. If partner’s decision is obvious but declarer needs to know your count, don’t signal! For example, if partner has ♠AKQJx and is clearly cashing spades, declarer might be guessing your length. Play randomly—don’t help declarer by showing count.
2. Confusing Signal Types
Don’t give attitude when partner needs count, or count when partner needs suit preference. This usually happens from rote following of “rules” without thinking about context. Ask yourself: what does partner need to know?
3. Being Too Subtle
If you hold ♠9753, don’t signal encouragement with the ♠5. Partner might not realize the ♠5 is “high.” Use the ♠9 or ♠7—make it obvious! Save the subtle signals for when you don’t have a choice.
4. Wasting Key Cards
With ♦QJ109, you want to encourage, but with standard signals that means playing high. Don’t play the ♦Q! The ♦10 is plenty high enough. Similarly, with four small cards like ♣7543, play the ♣7 to encourage, not something middling.
5. Forgetting to Watch Partner’s Signals
You’re not just sending signals—you’re receiving them. Pay attention to the card partner plays. If partner plays the ♠2 (clearly discouraging) and you later continue spades anyway, you’re wasting the whole point of defensive signals.
6. Signaling on Every Card
Not every card you play is a signal. Sometimes you need to follow suit with your only card in that suit, or you need to keep specific cards for later. Signal when you have a choice and when the information matters, not mechanically on every trick.
7. Giving Up Too Much
Remember, declarer can see your signals too. If you show out of a suit or reveal your exact count, declarer might be able to read the entire hand. Sometimes playing randomly (or even “wrong” signals) is the winning defense when accurate signals help declarer more than partner.
Sharpen Your Strategy with Brian
Want to put these strategic concepts into practice? Brian analyzes your bridge hands and explains the optimal line of play. Try Brian free →
Putting It All Together
Bridge defensive carding transforms defense from two individuals into a partnership. By coordinating through signals, attitude, count, and suit preference, you and partner can defeat contracts that would otherwise make.
Start with the basics: learn standard or upside-down attitude, practice giving count, and understand when suit preference applies. As you gain experience, you’ll develop judgment about which signal to prioritize and when to break the “rules” for tactical reasons.
Most importantly, discuss your agreements with partner before you play. Agreement on what signals mean is far more important than which specific method you choose. Whether you play standard, upside-down, or Smith echo, make sure you’re both on the same page.
Good defensive carding isn’t about playing the “correct” card by some rigid formula. It’s about thinking: What does partner need to know? What will help us beat this contract? That mindset, combined with solid agreements and careful attention to partner’s signals, will make you a formidable defender.
Now go forth and signal! Your partner will thank you.